We have talked a lot about guarding the ball handler, jamming the dribbler when the ball is picked up, defending against passes, helpside defense, and what happens when the ball moves. Today we’re going to talk about what happens when the dribbler gets by our defender and moves towards the red zone.
Remember that our number one priority is to keep the ball out of the red zone. This is one of the reason we have our helpside defenders.
The image below shows our setup. The point guard has the ball, our defender (x1) has been able to push the point guard close to one of our push points. Our x2 and x4 defenders are in place to block the pass, and x3 and x5 are in our helpside I.
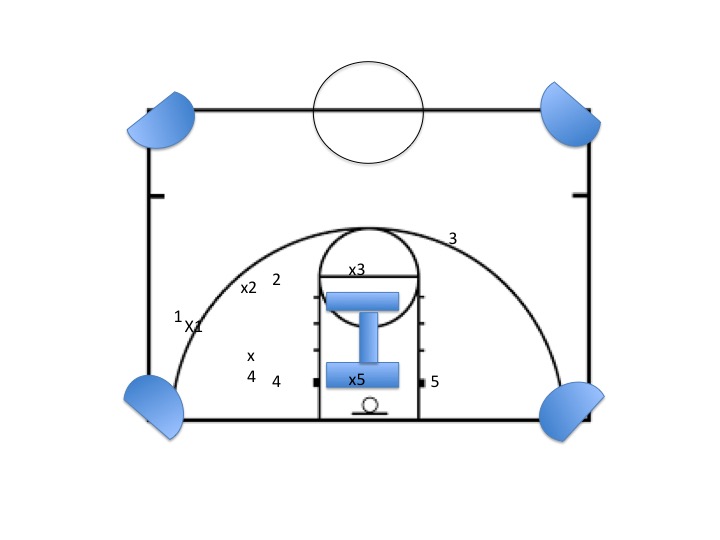
However, the point guard gets past our defender and starts dribbling towards the low block. As this happens the ballside offensive players rotate to be able to take the pass and shoot.
Our defenders move with them. Our x5 is moving forward to get in the point guard’s way and take the charge, x1 moves off to helpside while x3 moves down to support and trap the point guard.
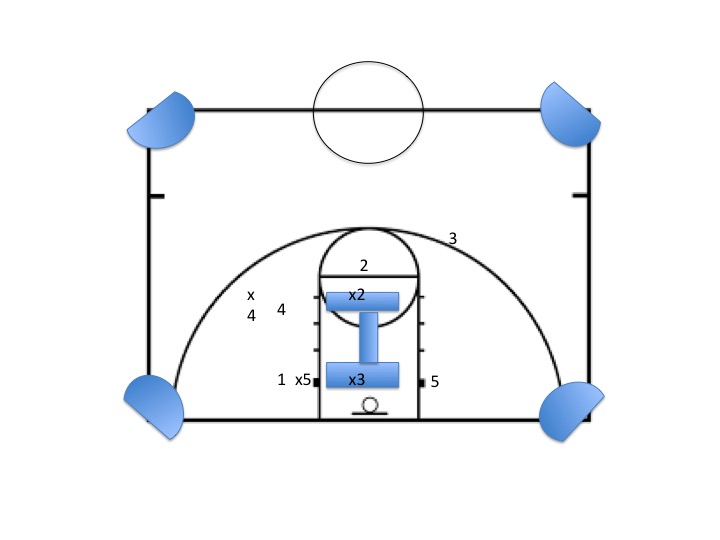
At this point, x5 takes the charge to keep the point guard from getting into the red zone and scoring. To take the charge, there are a few things our defender needs to keep in mind:
- The defender has to beat the offensive player to the spot.
- The defender has to face the offensive player.
- The defender has to set their feet and stop moving them.
- The defender needs to stay outside the 4’ circle in front of the basket.
To take the charge, our x5 player’s knees should be soft. They should take the charge on the chest and be prepared to roll when hitting the ground to get out of the offensive player’s way.
