
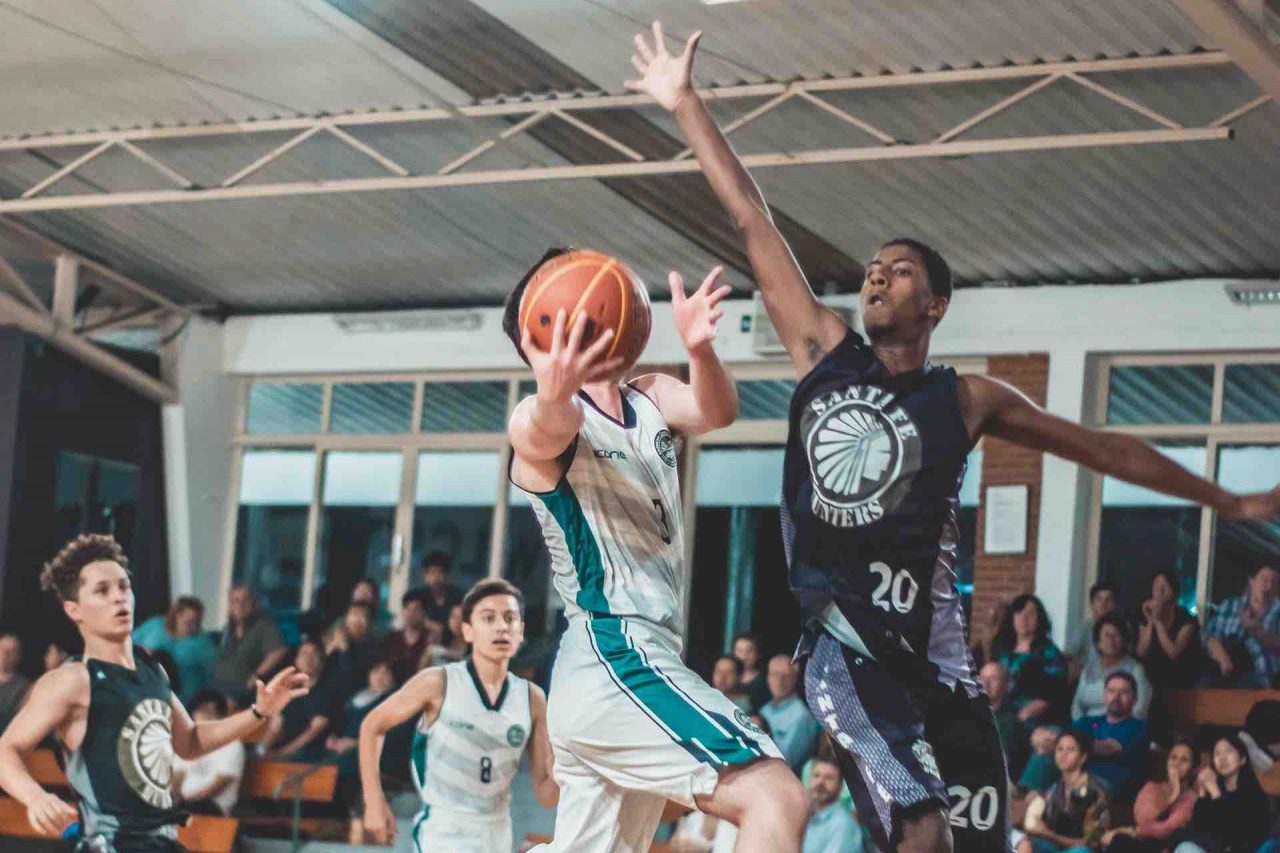
In previous posts we have discussed defending the dribbler, jamming the dribbler, and defending against passes. We left the posts presenting the situation below, where the point guard (#1) has the ball and players #2 and #4 are on the ball side of the court. All three of these players are being defended to protect against the ball getting into the red zone.
But what about the other two offensive players? Should we go and cover them too to prevent passes. Notice below that players #3 and #5 are both more than one pass away from the ball.
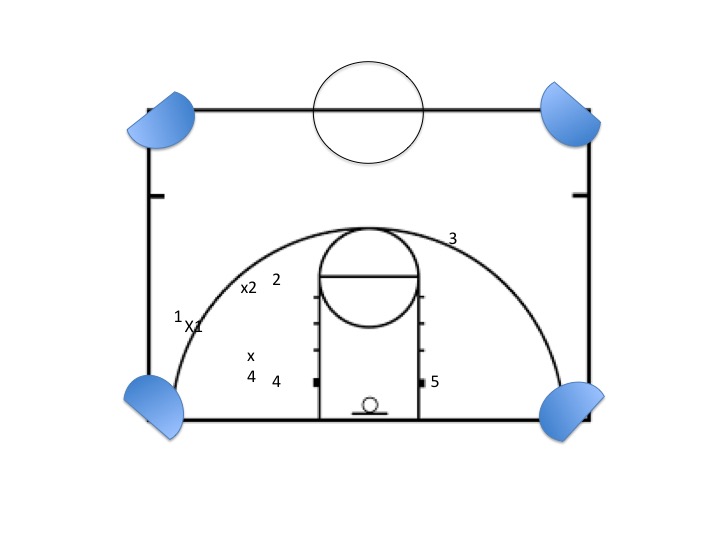
The answer to this is no. We want to go into helpside defense. Those defenders who are not guarding someone on the ball side move into the red zone. We want to think of the red zone as an “I.” The top of the I is the top part of the keys near the elbows. The bottom part of the I is the blocks. We want our defenders at the top and the bottom of the I (see below).

With the offensive players where they are, we’d want out defenders (x3 and x5) in the following positions:
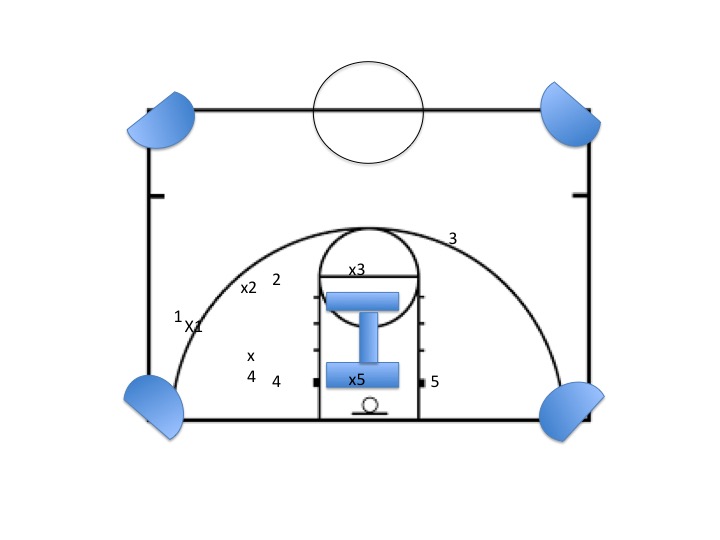
From these positions our two defenders can do several things. First, they can see. Second, they can move and intercept a pass to those defenders. Third, as last resort if necessary they can move to keep the ball handler from entering the red zone by taking a charge.
Helpside defense is an important part of a basketball defense. In the next post we’ll talk about what happens when the ball moves.
1 thought on “Basketball Defense: Helpside Part 1”
Comments are closed.