Recently I had a post on social media about the importance of the squat for athletics. A friend that I really respect asked me about my thoughts on progressions for teaching the lift. I thought this would make a good post, but I’ll warn you in advance that I think we make this lift way too complicated.
First off, if you work in a one-on-one situation then you have the luxury of time. You also have the need to really sell your services, which means that there is a need to make the entire process appear extremely complex. I’ve seen plenty of articles over the years with algorithms for teaching the squat. If the athlete does this, it means that x is too tight, which means we need y cue and z remedial exercise. Nothing wrong with this, nothing wrong with making money.
However, in a team coaching environment you don’t have that luxury. I’ve had to teach this lift to 40 people at a time and that’s not unusual in a coaching environment, so I have to keep things very simple and focus on what’s important. In addition, in a team coaching environment time is never your friend.
Let me begin by saying that over the years I’ve had to realize that every athlete is different. Now, this seems like an obvious statement but you’d be surprised how often we try to force our ideal of perfect form on athletes, even if their body is unsuited for that form. Limbs too long or too short, torso too long or short, all this has an impact on technique and you have to be flexible.
When I’m coaching the squat I focus on a few very simple cues and progressions. Talking at length about it is not going to help teach the lift, it’s going to confuse the athlete (or worse) the athletes are only going to hear the first two or three words, so you have to keep it simple. The other thing that’s important with any coaching situation, avoid the word “don’t.”
Try this. Close your eyes and picture the red car. Do you see the red car? Good. Now close your eyes and have someone read the next line to you. Don’t look at the red car. Open your eyes, what did you see? Most of us saw the red car anyway. That’s how powerful “don’t” is and it’s a word we overuse everywhere! So, you have to stay positive on the cues.
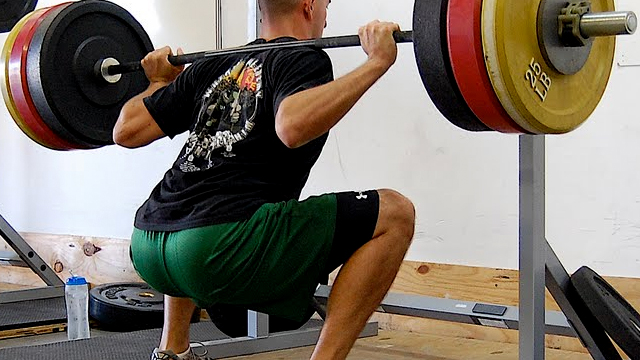
I start with bodyweight squats. Cues: look up, big chest, push your hips back, weight on your heels. That’s it. With that the athlete has their shoulders back, they’re avoiding doing the squat by pushing the knees forward, and they’re keeping their feet flat on the ground.
If the athlete has trouble keeping their shoulders back, then the next cue might be: “shoulders back, big chest.” If they have trouble with pushing the hips back, the next cue might be “put your stomach between your legs.”
Notice, nowhere am I saying “don’t.” Don’t round your shoulders. Don’t push your knees forward. Don’t lift your heels up. See where I’m going with this?
Now, the big chest cue is one we have to work on a long time. Everyone gets it when the lift starts, but about two or three reps in they will start to lose it. So this has to be reemphasized throughout the lift.
If the lift is begun by pushing the hips back (as opposed to pushing the knees forward), this then keeps the heels on the ground. If the athlete has issues with this, then the next step is to get a bench or a chair and put it behind the athlete and have them try to touch their bottom to the chair as they squat down.
I know, it’s not sexy and incredibly complicated. When I started down this road I’d do this long lecture before anyone gets to try the lift. I’d demonstrate, explain, demonstrate again, go over the “don’ts” and then be floored that nobody listened. So now I demonstrate, turn them loose on bodyweight squats, then cue the lift. This approach works better for me, even if I don’t get to lecture and sound really smart.